Your website’s title tags are a key part of optimising your site for search engines. In other words, they’re a vital part of SEO. Unfortunately, the stunning titles you create for your monthly blog posts aren’t always going to fit in the limited space provided by Google and other search engines in their search listings. So it’s often going to be important for you to create a separate title especially for search engines. And to give them that title when you’re using WordPress, you need to know how to change a title tag in WordPress, as it’s not the same process as for other platforms.
Below you can listen to the audio or scroll down to continue reading and I’ll show you how to do it via two easy methods.
Topics covered
What is a Title Tag? + Everything else you need to know about title tags

Before you get started, I want to make sure you understand exactly what you’re working with here. You see, despite the name, a title tag isn’t the same as a page title.
The page title is the level 1 heading (or h1), which is displayed at the top of a webpage or blog post (or product description, etc.). The title tag, which is also often called the meta title or SEO title, is not shown on the webpage or blog post. Instead, it’s tucked away in a page’s code and may be used by Google and other search engines as the title in their search results.
Note, WordPress will use your h1 title as the title tag if you don’t provide one.
Google will show up to 600 pixels worth of a title tag. This equates to around 60 characters, give or take a few, depending on the width of each character (for example, i is much narrower than w and therefore takes up fewer pixels). So it’s a good idea to aim for 60 characters or less when crafting your title tags if you don’t want them to be truncated.
Title tags that strategically use SEO keywords will be sent to the front of the line when search bots start their search for relevant posts. Custom title tags can also improve your click-through rate (the proportion of people who click on your search listings and go through to your pages).
Google dislikes click-bait titles that bare little resemblance to the content of a page, so it’s important your title tags accurately describe your pages. And including your brand name at the end of your title tags can improve brand awareness.
You could edit your pages’s code directly to change your title tags. But for most users, plugins are a much easier way to do this. Using plugins requires minimal effort and no coding experience. However, if you choose this route, you’ll need to sign up for a WordPress plugin-enabled plan (or have a self-hosted WordPress site).
Using RankMath to change a title tag in WordPress

I always used to recommend Yoast SEO to anyone looking for a WordPress SEO plugin. However, now my favourite WordPress SEO plugin is RankMath. RankMath offers heaps of 100% free tools, and free is the perfect price for many small businesses using WordPress. One of my favourite free features of RankMath that isn’t available for free through Yoast, is automatic URL redirection — if you change the slug of a page or your site structure, RankMath will automatically send people who attempt to visit the old address to the new address. And if you find yourself looking for more advanced features, RankMath offers better value for money than Yoast. So, if you don’t already have an SEO plugin, I suggest installing RankMath.
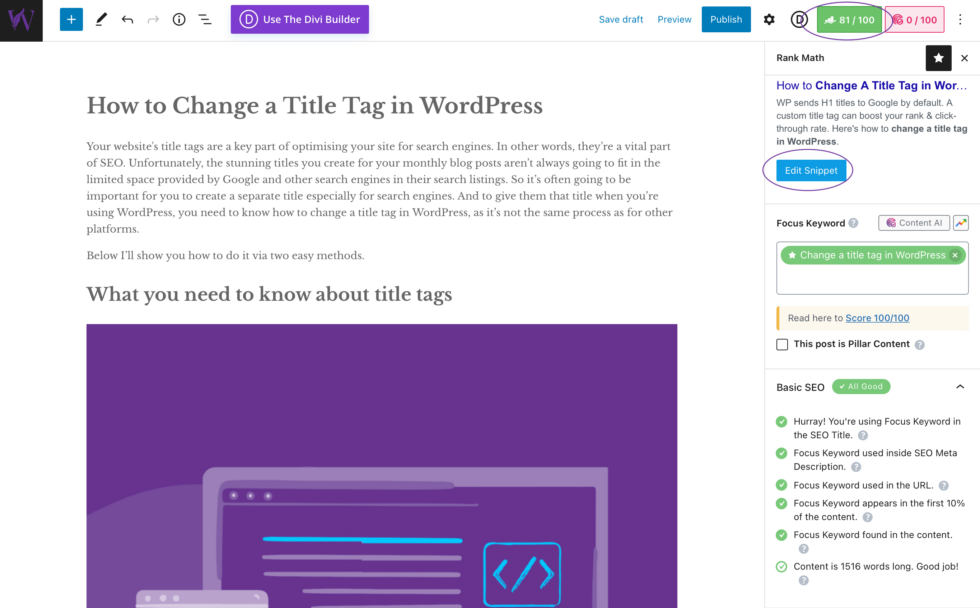
To change a title tag in WordPress using RankMath, you can either go to the individual web page, product description, or blog post, or you can edit it from the post/pages/products menus. The latter method is great if you need to change several title tags at the same time.
To edit a title tag directly in the post or web page, simply click the RankMath button in the menu bar, then click ‘Edit snippet’ and replace the automatically generated ‘Title’ text with your custom version. RankMath will give you instant feedback about the length of your title tag, so you can ensure it won’t get truncated by Google. When you publish the post, RankMath will generate the code required to give your text to search engines.
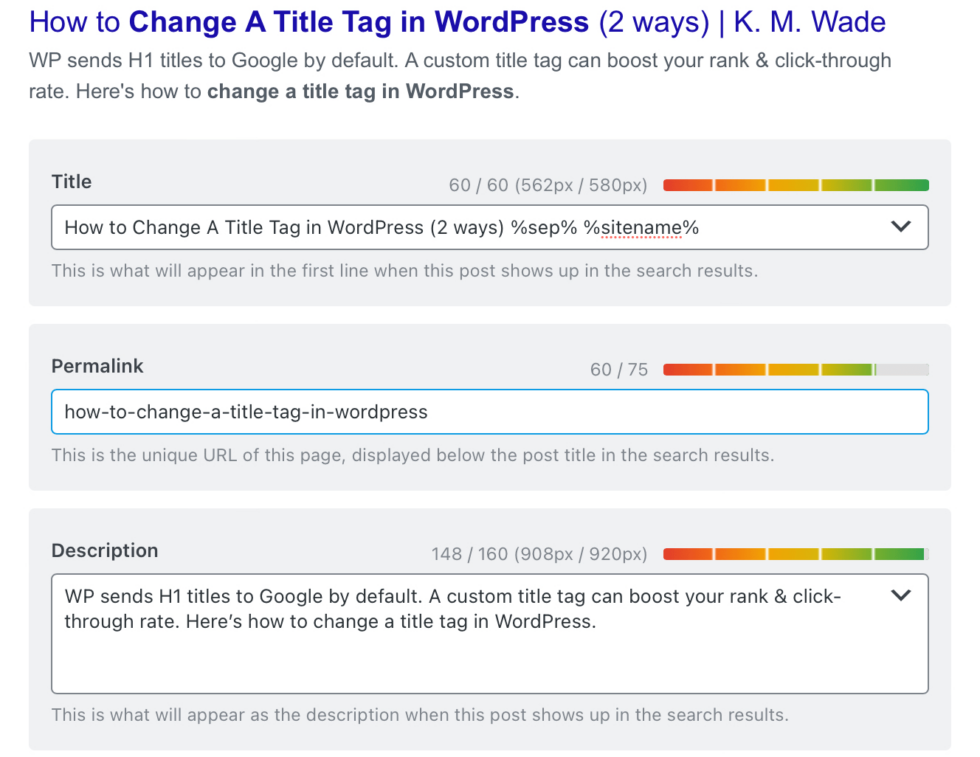
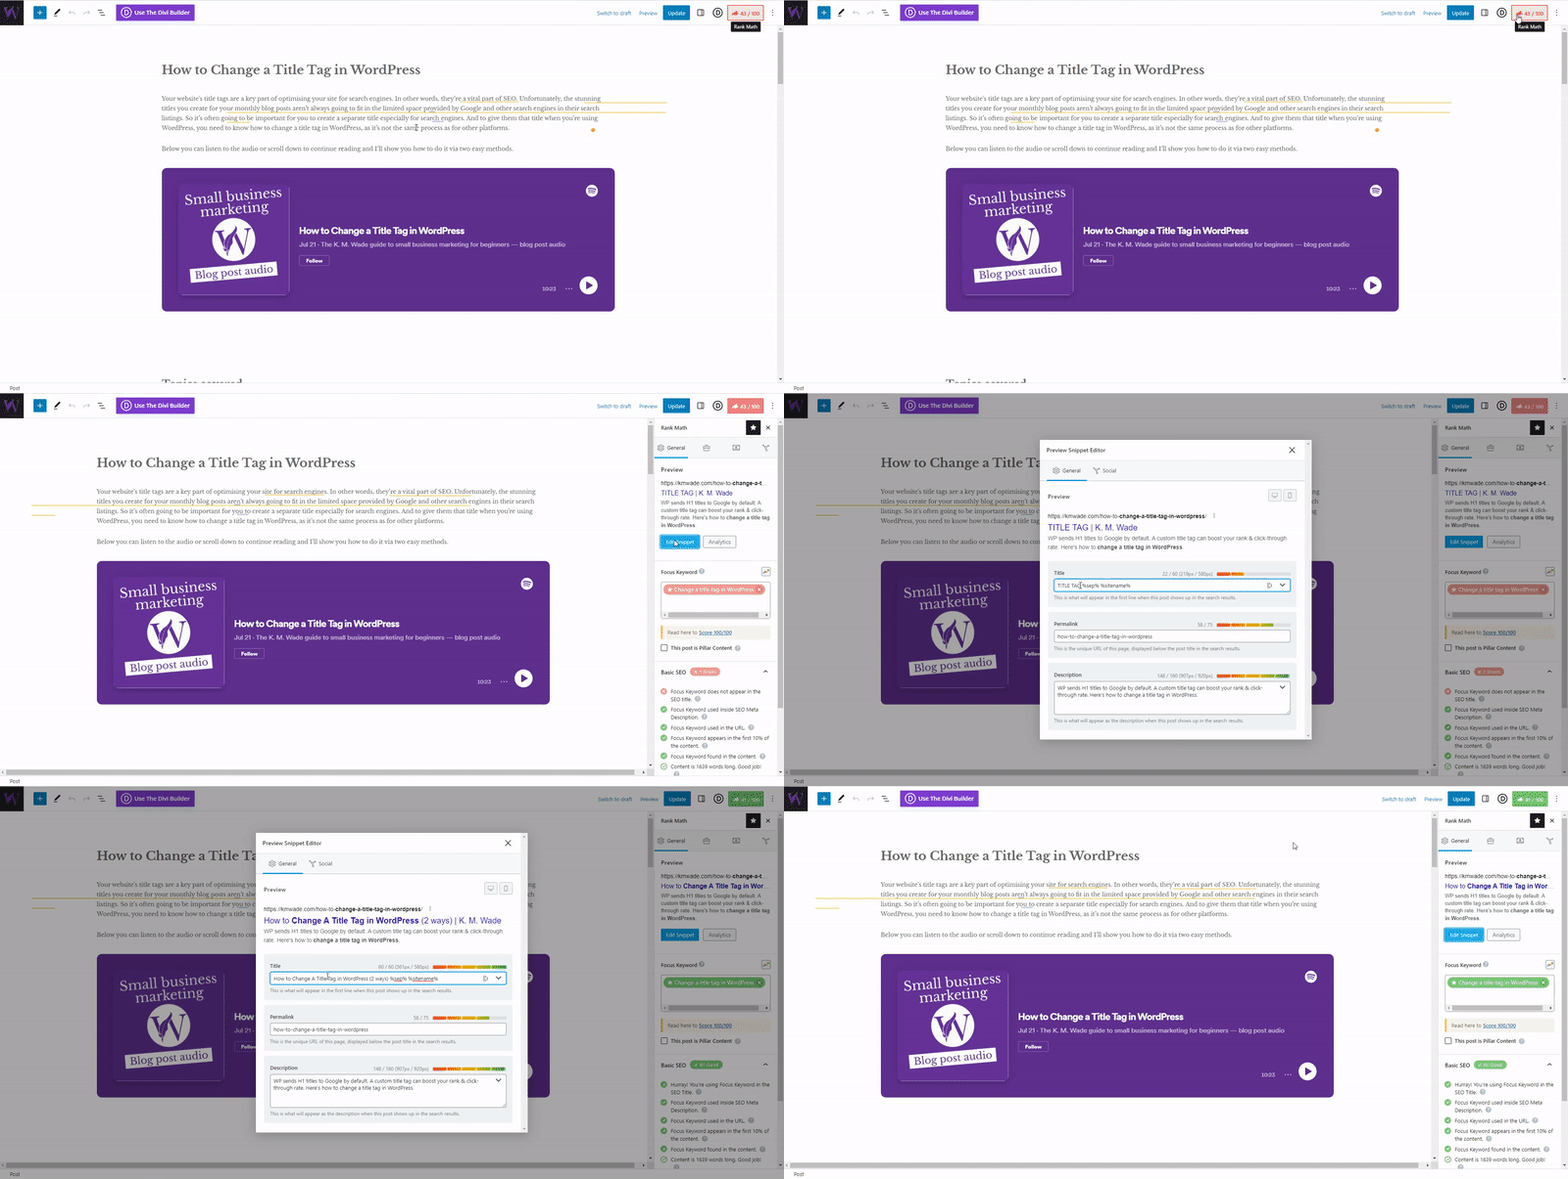
By default, RankMath populates the title tag with %title% %sep% %sitename% . %title is your h1 title, %sep% is a separator and %sitename% is your site’s title, which is usually your brand name. For best results, it’s a good idea to keep the separator and your site’s name, and replace the title with your carefully crafted title tag words. Constructing your title tags this way will automatically add the correct separator and your brand name, and keep them consistent across your whole site if you make changes later. If you accidentally overwrite the shortcodes for the separator and brand name and you can’t remember the shortcodes, you can add them using the dropdown.
And that’s the basics. Pretty easy, isn’t it?
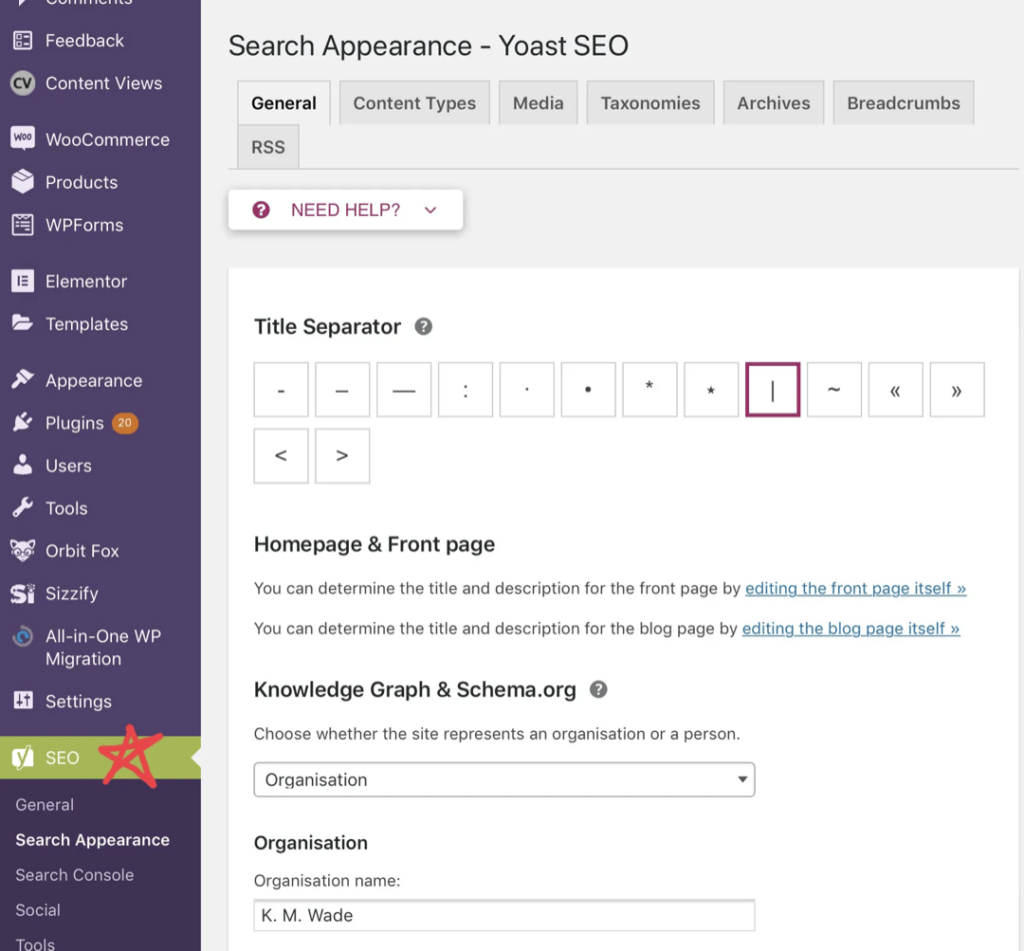
However, you may like to go further than that and make some changes to your settings that will apply to all title tags. For instance, you might like to choose which separator to use between your titles and brand name. E.g. I structure my SEO titles as Title | K. M. Wade but you might prefer something like Title — Brand or any of several other options.
Once you’ve installed and activated RankMath, you can change these and several other settings related to title tags by hovering over the Rank Math settings in the menu. In doing so, you should see the Titles and Meta options. There’s an insane number of customisation options there, so it’s worth it to poke around and see what changes you can implement to boost your SEO. In particular, if you’d like to be able to edit your title tags in bulk, head to Rank Math > Titles & Meta > Posts, and click to enable bulk editing. However, all of this is optional.
Should you want to use use the RankMath bulk edit tool, head on over to your posts. You should see two columns that say ‘SEO details’ and ‘SEO title’. Clicking ‘SEO title’ will enable you to change all your blog post title tags in one go.
If you’d like, RankMath allows you to create a custom title template for your posts. Head back to Title and Meta under Rank Math, click on Posts, and then Single Posts title. Changing things here will allow you to have a default title template that makes optimising new pages faster without making too many adjustments.
Using Yoast SEO to change title tags

Yoast SEO has been around a lot longer than RankMath, so is the more popular plugin for WordPress users. If you’ve already got it installed, here’s how to use it to change your title tags with this tool:
- Open your page or blog post (or product description etc.).
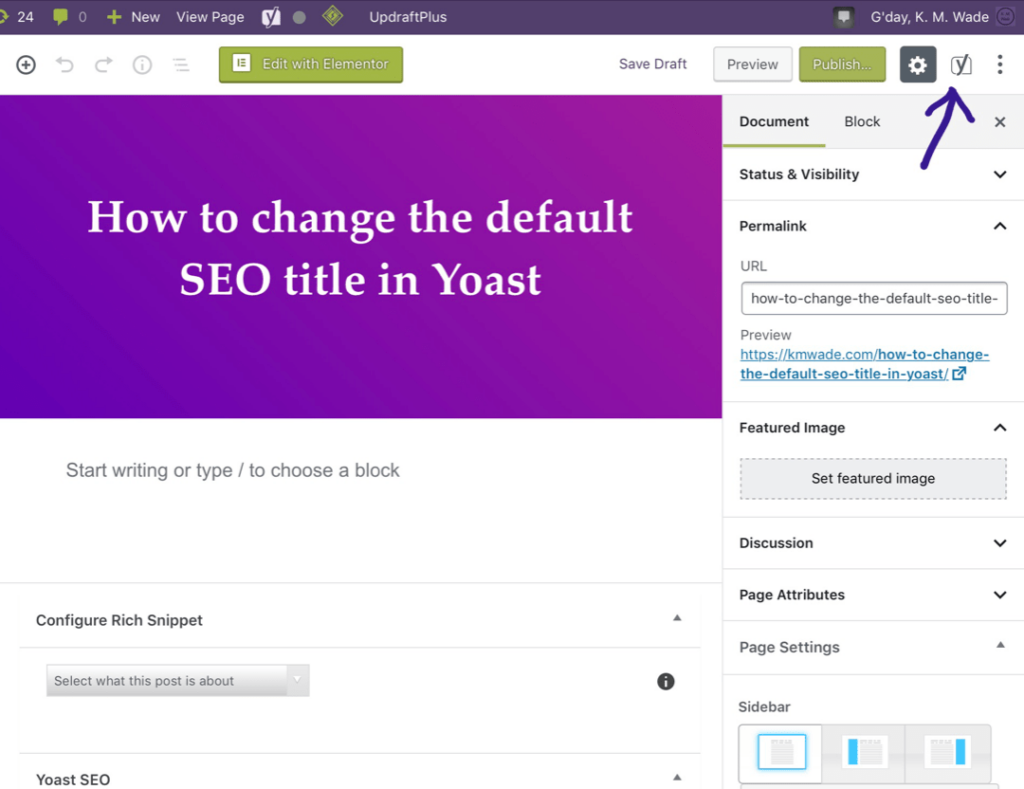
- Click on the Yoast SEO icon to open the SEO sidebar, or scroll to the bottom of your content until you find the SEO section.
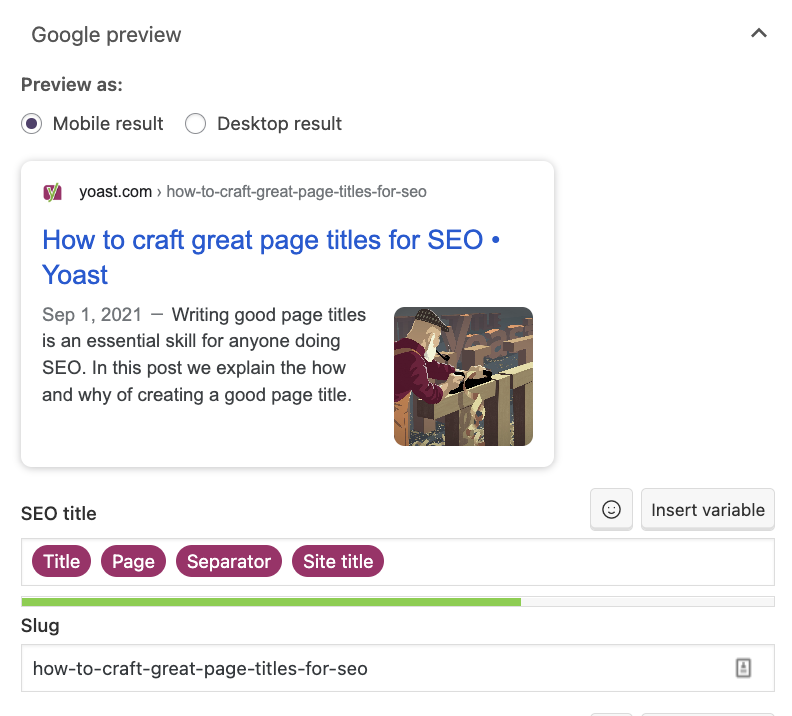
- Open the snippet editor and locate the ‘SEO title’ field.
- Delete any of the snippet variables you don’t want to keep and replace them with your desired SEO title (ideally with the separator and site title snippet variables at the end). The Yoast plugin will tell you if your SEO title is too long. (The red bar in the picture below indicates the title is too long. When the title is a good length, the bar turns green. If your title is short enough that Yoast thinks you’re wasting valuable title real estate, the bar will turn orange.) If you’ve been provided with an SEO title by an SEO writer, make sure you use the exact title they’ve specified if you want to get the full benefits of their expertise.
- Save your page, or publish it if you’re ready to publish it. Yoast SEO will then turn your SEO title into a title tag and add it to your page/post’s HTML code.
And that’s it. Pretty easy as well, right?
As with RankMath, you can use Yoast SEO to change your default separator. Just go to ‘SEO’, ‘Search Appearance’ and the ‘General’ tab and choose the title separator you like best.
Keep your title tags up to date
Optimising your title tags could take some practice and research. But manipulating your title tags is essential for a growing small business. So, use these powerful plugins to your advantage. While either would work well, RankMath, in particular, is fantastic for its array of tools at no cost. Whichever method you choose, be sure to keep your title tags updated. For instance, if you include the year in your title, don’t forget to review and revise your content next year to keep it fresh and relevant and then update the title to keep it accurate and enticing.
If you’re still getting the hang of the ins and outs of WordPress page management and want to know how to change your meta description too, check out this related post.
